Setting up a Raspberry Pi Media Server
It has been a little over three years since I have setup a Raspberry Pi based wireless media server. This little media server has done a great job and it continues to function flawlessly serving many DLNA clients in the home network including one 3D projector, several mobile phones, tablets, PCs and Macs. I needed an always on light weight media server that can serve all of my DLNA compliant devices. Three years back, when I was setting this up, I tried out many different media servers including KODI, OSMC, Plex and MiniDLNA. At the end, I settled for a MiniDLNA server on a Raspberry Pi 3B+. My choice couldn’t have been better.
What is DLNA?
DLNA, which stands for Digital Living Network Alliance is an industry-wide standard for sharing digital media over a home network. DLNA compatible clients can connect to a DLNA server and consume digital media on the server through the home network. Any DLNA certified TV, projector or streaming device can act as a DLNA client. PCs, Macs, Linux boxes, mobile phones and tablets can be converted to DLNA clients by using appropriate DLNA client software. Any PC, Mac or Linux box can be configured as a DLNA server. Tiny single board computers such as Raspberry Pis are gaining popularity as DLNA servers due to their small footprint and low energy consumption. However, these credit card sized computers are limited by their processing power and other computational resources.
The Server Hardware
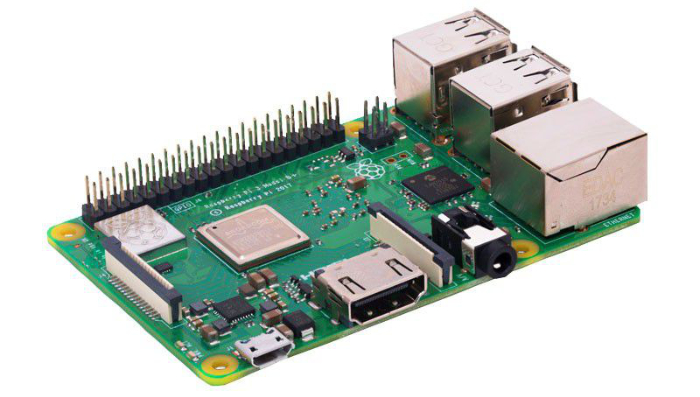
I opted for the single board computer Raspberry Pi 3B+. It was the latest version of Raspberry Pi available back then. The Pi 3B+ came with the following specification.
- SoC: Broadcom BCM2837B0 quad-core A53 (ARMv8) 64-bit @ 1.4GHz
- GPU: Broadcom Videocore-IV
- RAM: 1GB LPDDR2 SDRAM
- Networking: Gigabit Ethernet (via USB channel), 2.4GHz and 5GHz 802.11b/g/n/ac Wi-Fi
- Bluetooth: Bluetooth 4.2, Bluetooth Low Energy (BLE)
- Storage: Micro-SD
- GPIO: 40-pin GPIO header, populated
- Ports: HDMI, 3.5mm analogue audio-video jack, 4x USB 2.0, Ethernet, Camera Serial Interface (CSI), Display Serial Interface (DSI)
- Dimensions: 82mm x 56mm x 19.5mm, 50g
I housed my Pi 3B+ in an aluminum enclosure that doubles as a giant heat sink. This keeps Pi’s CPU and GPU temperatures around 46 degrees Celsius when idle. It runs the latest version of Raspberry Pi OS Lite. This operating system and other necessary software occupied approximately 10% of the Micro-SD card storage space. When idle, only 12% of the RAM is used. I have two USB 3.0 drives (128 GB drive for photos and 256 GB drive for movies) plugged into my Pi 3B+.
The Server Software
I have installed the Lite version of Raspberry Pi OS. This 444 MB download is much smaller than its desktop counterparts. It does not include a graphical user interface or other optional bundled software. You can easily transfer the downloaded OS image to a Micro SD card via Raspberry Pi Imager downloadable from https://raspberrypi.org.
Setting-up Raspberry Pi
Here is a step by step guide to setup your Raspberry Pi based media server.
-
Download the Raspberry Pi Lite OS image from https://raspberrypi.org.
-
Download the Raspberry Pi Imager from the same web site.
-
Insert the Micro SD card to your computer
-
Transfer the image to Micro SD card using Raspberry Pi Imager. To do this, open up Raspberry Pi Imager → Click on CHOOSE OS → Scroll down and select “Use custom” → Select the downloaded zip file → Click on Write
-
Insert the Micro SD card into Raspberry Pi, connect a mouse and a keyboard and turn on the device.
-
Login to your Pi with default username (pi) and password (raspberry)
-
Execute the following command
sudo raspi-config -
Select Network Options → Wifi and enter your SSID and password.
-
Secure Socket Shell Protocol (SSH) is quite useful for configuring the Pi over the network. You can enable SSH using following commands.
sudo systemctl enable ssh sudo systemctl start ssh -
Update the Pi’s software to the latest version by running following commands.
sudo apt update sudo apt upgrade -
Install MiniDLNA with the following command.
sudo apt install minidlna -
Plugin your USB drives. In my case, I plugged in two USB 3.0 drives.
-
Mount your USB drives as follows.
i. Find UUIDs (Universally Unique Identifiers) of your USB drives by executing the following command.
blkidii. Note down UUIDs of your USB drives.
iii. Create mount points for your USB drives. Mount points are folders that point to the contents of your flash drives. Change ownership of folders to the pi user.
sudo mkdir /mnt/photo
sudo mkdir /mnt/video
sudo chown -R pi:pi /mnt/photo
sudo chown -R pi:pi /mnt/video
iv. Open the fstab file with nano editor.
sudo nano /etc/fstabAdd the following lines to fstab. Make sure to replace my UUIDs and mount points with yours.
UUID=3E1D-1C18 /mnt/photo vfat uid=pi,gid=pi 0 0
UUID=84AB-130E /mnt/video vfat uid=pi,gid=pi 0 0
Use Ctrl+O to save and Ctrl+X to exit nano editor.
v. Reboot the Pi with the following command.
sudo reboot -
Open the minidlna configuration file located under /etc with nano editor.
sudo nano /etc/minidlna.conf -
Add the following lines to minidlna configuration file. My photos are located under the MyPhotos folder in one usb drive and videos are located under the Media → Videos folder in the other drive. Here, P stands for Photo and V stands for Video. You can use A for audio. Use Ctrl+O to save and Ctrl+X to exit nano editor.
media_dir=P,/mnt/photo/MyPhotos media_dir=V,/mnt/video/Media/Videos friendly_name=Name of your DLNA server -
Restart the minidlna service with the following command.
sudo systemctl restart minidlna -
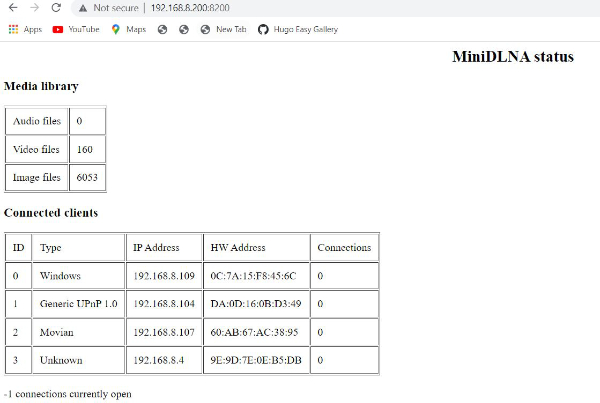
At this point you should have a fully functional DLNA server. It should pop up in all of your DLNA compliant devices. You can check the status of your MiniDLNA server by visiting http://IP address of your pi:8200. You can locate the IP address by executing the following command.
hostname -I
DLNA Clients
If your TV or projector supports DLNA, your DLNA server should pop up under inputs. If you are using a PC, you should be able to stream media with Windows Media Player. I use DLNA client app, Movian downloadable from https://movian.tv on my android devices and Macs.
RaspController
RaspController is an app that you can download from the Google play store. The free version of RaspController can be used for monitoring and basic maintenance of the media server. It can also be used to shutdown or reboot your Pi.
Transferring Files to DLNA Server
I found it slow to transfer large video files over the network to Pi. My workflow involves shutting down the server with RaspController, unplugging the USBs, transferring the files directly from a computer and re plugging USBs to Pi. Since, this is an occasional chore, it works out well for me.